Make your meals special with the mix of tender duck meat and crispy skin. This guide will show you how to make crispy duck breast at home. You’ll learn how to pick the best cut and how to get the skin crispy.
Key Points
- Have an appreciation of the duck breast grading system and how to choose the freshest cut
- Appreciate the need of duck fat rendering for maximum skin crispness
- Know the skin scoring techniques that will guarantee full crispiness
- Know how to cook the breast so that the meat is juicy but the skin is crunchy
- How to rest and serve crispy duck breast together with garnishes and sauces
Picking the Right Duck Breast
For a cook focused on achieving the desired crispiness and taste, the importance of the right duck breast cannot be underestimated. It is worthwhile to appreciate the various grades available and go for the freshest cuts.
Grading of Duck Breasts
However, duck breasts are graded based on their fat composition and weather of texture, and how good the quality is. Premium or Grade A is the highest grade, This one features high fat content and soft but muscular structure. These grade cuts are ideal for skin that has to be deep fried and remain moist with meat inside.
Methods of Choosing Fresh Duck Breast
- Do not buy duck breasts unless they are bright red or reddish pink in color and are moist and slightly bulging.
- Duck breasts should not have any other color than that and should not be dehydrated and smelly.
- Whenever possible, buy or use dressed duck breasts that are sourced from local farms or suppliers since they tend to be fresher and better quality.
- Know the various types of ducks because some breeds such as the Muscovy duck, provide succulently flavorful and tasty meat.
The knowledge of duck breast grades and fresh cut sourcing will surely help you prepare a mouthwatering crispy duck.

“When it comes to crispy duck breast, the trick lies in the selection. The right grade, along with the right age, will make or break what you want to achieve.”
Preparing the Duck Breast
Getting your duck breast ready is essential in achieving a crunchy dish. To begin with, make sure your duck has been properly prepared before onset of cooking. This entails some few simple steps that assist in your quest.
To start, get rid of the excess skin or fat using a knife. This aids in the crispiness of the skin when cooked in the pan. However, avoid removing excess fat as it helps in the crispiness.
After that, pat the duck breast dry with some kitchen paper. This step helps achieve a better brown and a crispy finish on the skin. Do not soak in water the duck as this will lead to the meat being water lodged.
In case your duck is over rather fattish and skin needs cleaning, make shallow incisions on the skin both ways. This facilitates further rendering of the fat underneath, hence crispier skin. Just try not to go too deep into the skin as cutting depths too far will result in meat juices leaking out.
If you have done the preparations for cooking a duck breast properly, you have a good chance of making a great dish. All the right moves, and you will have a perfectly crisp-skinned duck that will leave your guests speechless and your palate gratified.
Rendering the Fat
Rendering the fat on the duck breast is very important because it results in a crispy and delicious skin. This step gradually melts and removes all the fat from the duck skin. It forms a beautiful, crunchy layer, which further enhances the dish.
Why Rendering Duck Fat Is Important
Duck fat rendering is almost always a necessity for every cook. It helps in cutting down the moistness in the exposed skin which in turn helps to crisp it up while cooking. Besides, the rendered fat can also be stored for use in cooking other food items such as vegetables or potatoes. All chefs and even home cooks regale in using this fat due to its distinct, culinary, and palatable variations.
HOW TO RENDER DUCK FAT
There are a few good ways to render duck fat. An option would be to score the skin in a crosshatch pattern then place it skin side down into a cold skillet. Heat will be applied to it gradually so as to liquefy the fat. Another method would be to place the duck on a wire rack set on a baking sheet and bake at 300degrees F or 150 degrees C until the fat has completely rendered from the meat.
Rendering duck fat is the part that requires a lot of patience. Making it melted on low heat by taking your time will guarantee the skin is brown and crispy. This will certainly pamper your visitors.
Scoring the Skin
Scoring the duck breast skin is a simplicity enhanced. This is done to help the fat render out of the skin more and create a better crunch. When cutting against the grain of the skin, for example, making cuts that have a trench formation made in those places so that fat during the process of cooking does not escape and remain above the surface.
The main objective when scoring duck breast skin in the right way, is to attempt to refrain from cutting so deep into the meats surface. Reason being you want to make shallow cuts that are evenly spaced and simply cut through the skin and just into the fat layer below. This is important as it allows for the skin to harden without any moisture loss to the flesh of the duck breast.
- The duck breast should be placed horizontally and slash cut into the skin at intervals of about 1/4 inch with a sharp knife.
- Make sure to put light pressure while slicing the meat in order for the cut not to go too deep and only cut through the skin and a bit of fat.
- After making the slashes on the duck breast begin again but turn the meat in a vertical position, thus making a crisscross pattern.
- Take caution not to make such cuts that are deep because it will dry the meat when subjected to hot temperatures.
If you make shallow cuts on the duck breast skin, it will help you to make the most out of your duck breast. This leads to a dish with an appetizing crispy surface and a rich, moist filling. This elementary process is a skill that every cook should master when preparing a juicy and crispy duck breast.
“Slicing the skin of a duck breast is the secret to the deep, rich flavors of duck meat. It’s a very simple yet an important step, which is rich in returns for every luscious mouthful.”
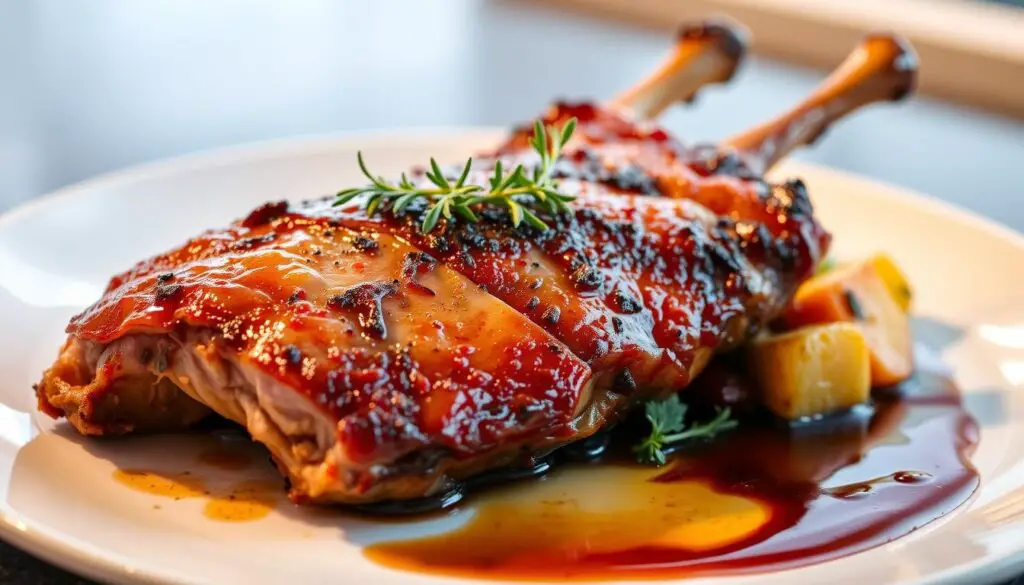
The Perfect Crispy Duck Breast
Crispy duck breast is a culinary technique I’ve mastered, but I can tell that it requires a lot of practice. For a golden brown crunchy skin, a perfect mouth watering meat, read these instructions:
- Ovens should be preheated to 400 °F (200 °C). It is important to use this heat because it helps in making the skin very crisp.
- Put the scored duck breast skin side down inside a previously cold cast iron or oven safe skillets. This allows for cooking of the skin and rendering of the fat without cooking the meat.
- Place the duck breast skin side down in a pan.
- Place the skinned duck breast in the hot pan, and periodically check until the skin is deep brown and crispy. Be careful, because the skin might overcook, and the heat has to be adjusted.
- Reposition the duck breast skin side up and place the skillet in the oven. Reduce the heat to medium and roast until done, about 8-10 minutes for rare and longer for medium or well done.
- After about five to ten minutes, remove the duck breast from the oven and allow it to sit before cutting. This prevents the meat from being dry despite being cut, it helps to lock the moisture in.
You see, by following these how to cook crispy duck breast steps, you will achieve a cooking crispy duck breast that everybody will not be able forget about it. Very simple, the trick is to be patient and to maintain the level of heat comfort. Alright, it is now time for the final resting and serving your work of art.
The Duties of Idle and Serving
Having fried well the breast of the duck, it is about time for add the finishing touches. It is very important to let duck rest so that it’s juices are evenly distributed and and the meat itself is tender. When finished resting, enjoy the cornucopia of garnishes and sauces that make the duck better.
Resting the Prepared Duck breast
The Contemplation phase consists of the following – if you have prepared the duck to the proper level of doneness, allow the meat to sit for around 5-10 minutes. This stage has its benefits in that one would enjoy flavorful, and juicy pieces. The only drawback is the increase in the internal temperature of the duck; therefore, monitoring is necessary.
Sauces and Accompaniments to Serve with Crispy Duck Breast
Now that the duck is done, it’s time to think of the right extras. Here are some great suggestions for your now rested duck breast:
- Some Variations Include: Thinly sliced crisp apples or a sweet and sour apple sauce to offset the fatty flavor of duck
- A few sprigs of fresh herbs like thyme rosemary or sage for color and aroma
- A thin layer of sauces for duck breast, cherry reduction, orange ginger, hoisin sauce or similar sauces
- Grilled or Roasted Brussels sprouts, Carrots or potatoes to balance the dish
Choosing garnishes for duck breast and sauces and then resting your duck breast will reward you with an exquisite dish. Last but not the least enjoy the duck crispy and every bite of it!
“This step about resting the duck breast is crucial for the meat to be moist and soft. Do not omit this step!”
Conclusion
Always remember the key to success is keeping the practice and having fun with it. All the effort that you put in will eventually result in a well prepared meal that will please everyone. The meal is bound to create a lasting impression to your friends and family.
For now, embark on your culinary journey and do not be afraid to experiment. There’s plenty of room for innovativeness considering the domain of a duck breast. Make the perfect seared and golden duck breast and take pride in that.
With the lessons that you have learnt, you are about to commence your journey to becoming a perfectionist in making crispy duck breasts. Have a nice meal!
FAQ
What are some important points to note to get perfectly crisp duck breast at home?
To achieve crispy duck breast at home, include the following key points: 1) Select the appropriate duck breast 2) Prepare it adequately 3) Render fat for crispy outer layer 4) Make score cuts on the skin. 5) Cook the duck meat properly. 6) Rest it and serve with sides and sauces.
How do I choose the best duck breast for crispy skin?
For crispy skin, pick a fresh, high-quality duck breast. It should have even fat on the skin. Stay away from dried out or discolored duck. The quality and freshness of the duck affect the crispiness.
Why is rendering the fat important for crispy duck skin?
Rendering the fat is key for crispy skin. It creates a barrier for crispiness and bastes the meat. This makes the duck breast juicy and flavorful.
What is the recommended method to achieve best results in skin scoring of a duck breast?
Scoring skin in crosshatch fashion is able to facilitate crisping. For shallow cuts of roughly 1/4 inch apart, use a sharp knife. Be keen not to cut through the meat.
What cooking methods should I use to prepare the duck breast with the utmost skin crispiness?
In order to achieve a crispy skin, first place the duck portions skin side down in a cold pan. Then, raise the heat in order to melt the fat and fry the skin. Once the golden brown color is achieved, turn it over and cook it to the desired doneness.
When should I rest and how do I serve a duck breast that is crisp and devoid of moisture?
After cooking, rest the duck for about five to ten minutes. This allows the meat juices to be absorbed into the meat. Adding garnishes such as roasted vegetables or fruit compotes will help liven up the presentation.